Introduction
A Service Request is a predefined, standard request that has received prior approval within an organization. This process is essential for streamlining operations and enhancing efficiency in service management. Service Requests are typically initiated when a user requires information, advice, or access to specific services that fall within the organization’s established guidelines.
The implementation of a structured list of pre-approved Service Requests significantly reduces the time and complexity associated with approval workflows. By categorizing these requests in advance, organizations can minimize delays, ensuring that users receive timely responses to their needs.
Configure Service Request settings
You can enhance Service Request details by adding fields alongside the predefined ones.
Navigate to Setup > Account > Service Desk.The Settings page is displayed.
From the top navigation tabs, select Service Request.

Under INCIDENT settings, configure the desired property settings.
Click SAVE to apply the changes.
Create a service request
Service Requests can be initiated using the following methods:
- Service Desk - Users can create service requests directly within the Service Desk module. This method ensures proper tracking, categorization, and assignment of service requests within the system.
- Email - Users can also create service requests via email, offering an alternative method for submitting requests.
Create a service request with Service Desk
Navigate to Command Center > Tickets.The Tickets page is displayed.
Click ADD + and select Service Request. The ADD SERVICE REQUEST page is displayed.

Enter the following information:
| Field name | Description |
|---|---|
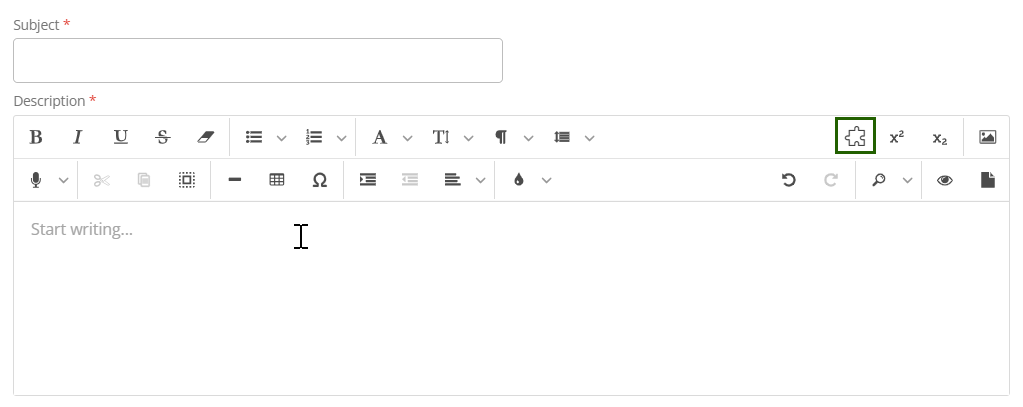
| Subject | Title or summary of the service request. |
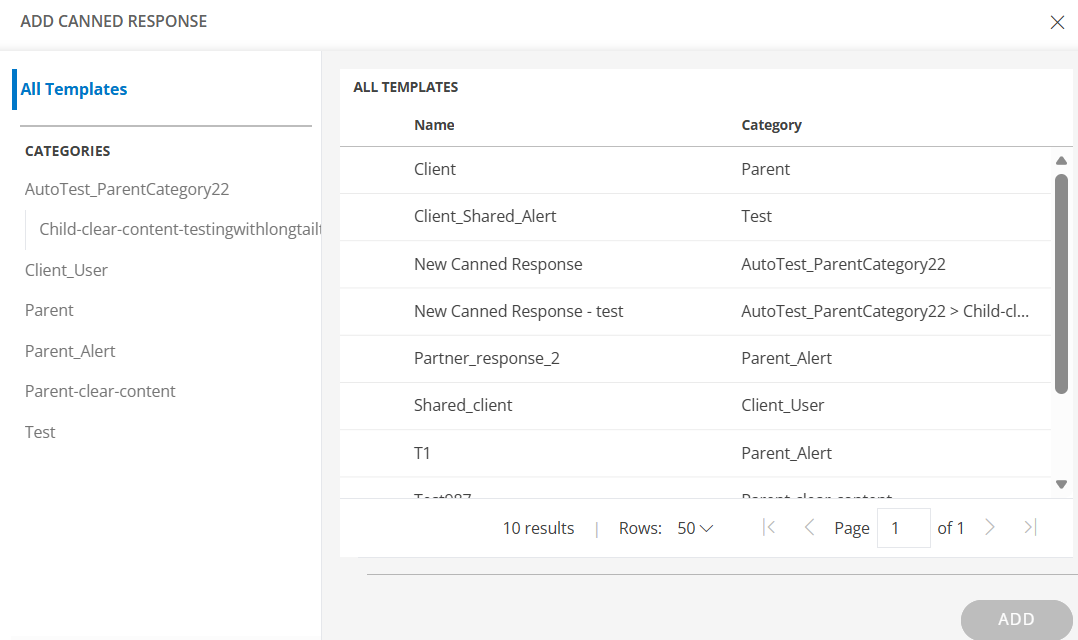
| Description | Provide a detailed explanation of the service request. This can include the actual behavior, expected behavior, and steps to reproduce the issue.You can also use the Canned Response option to quickly insert predefined, categorized response templates. Click the Canned Response icon to view the available categories, select a template, and the content will be automatically added to the Description field.
  |
| Requested By | Select the user who is requesting the service request. |
| Assignee Group | Choose a group responsible for managing the service request. |
| Assign to | Assign the service request to a specific user for execution. |
| Resources | Specify the resources required for implementing the service request. |
| Category | Select a category to classify the service request. |
| Sub Category | Subcategory under the category to which the service request is mapped. |
| Priority | Define the urgency of the service request. Available options: Very Low, Low, Normal, High, Urgent. |
| Cc | Add users who should be notified about the service request. |
| Knowledge Articles | Link the KB articles to the service request. |
| Attach Incidents / Tasks | Link related incidents or tasks to the service request. |
- Click ADD SERVICE REQUEST to initiate the request.
Create a Service Request with Email Requests
- Navigate to Setup > Account > Integrations.
- See Email Requests for more details on configuring Email Requests for service requests.
View Service Request
Access and review service request details and track their progress.
The service request page displays the following attributes:
| Attributes | Description |
|---|---|
| Status | Indicates the current state of the service request. |
| Subject | A summary or title that describes the service request. |
| Requested On | The date and time when the change was created or reported. |
| Time To First Response | The time taken from the service request creation to the first response by an assigned user or team. |
| Time To Resolution | The total duration from the service request's creation to its resolution or closure. |
| Approval | Status typically refers to the decision-making process within the change approval workflow. |
| Service Request Properties | Contains key details related to the service request. |
| Service Request Configurations | Settings and rules that define how service requests are handled. |
The service request page displays the following tabs:
| Tabs | Description |
|---|---|
| Activity | User activities on service request. The Activity tab includes the log, conversation, status, and notes related to the service request.
|
| Resources | The resources on which the service request is identified. |
| Articles | A section where you can view related knowledge base (KB) articles or add a new article. |
| Attached Requests | This section allows you to view any attached incidents or tasks, as well as the option to add a new one. |
| Integration Log | A log that contains inbound and outbound third-party communication details. |
Edit service requests
Edit a single service request
- Navigate to Command Center > Tickets and select a service request that you want to modify.
- You can either click on the service request ID to modify the details and save them or select Edit from the Actions dropdown menu to make changes to the details.
Edit multiple service requests
- On the Tickets page, select the multiple service requests for which you want to perform a bulk update.
- Click BULK UPDATE.The Update Actions page is displayed.
- Make the necessary changes and click SAVE.
Create a Follow-Up Service Request
You can reopen a closed service request or report a similar issue.
Prerequisite
Note
To view the Create Follow-up option, navigate to Setup > Account > Service Desk and enable the Enable user to create a follow-up incident while updating a closed incident setting on the incident Settings page.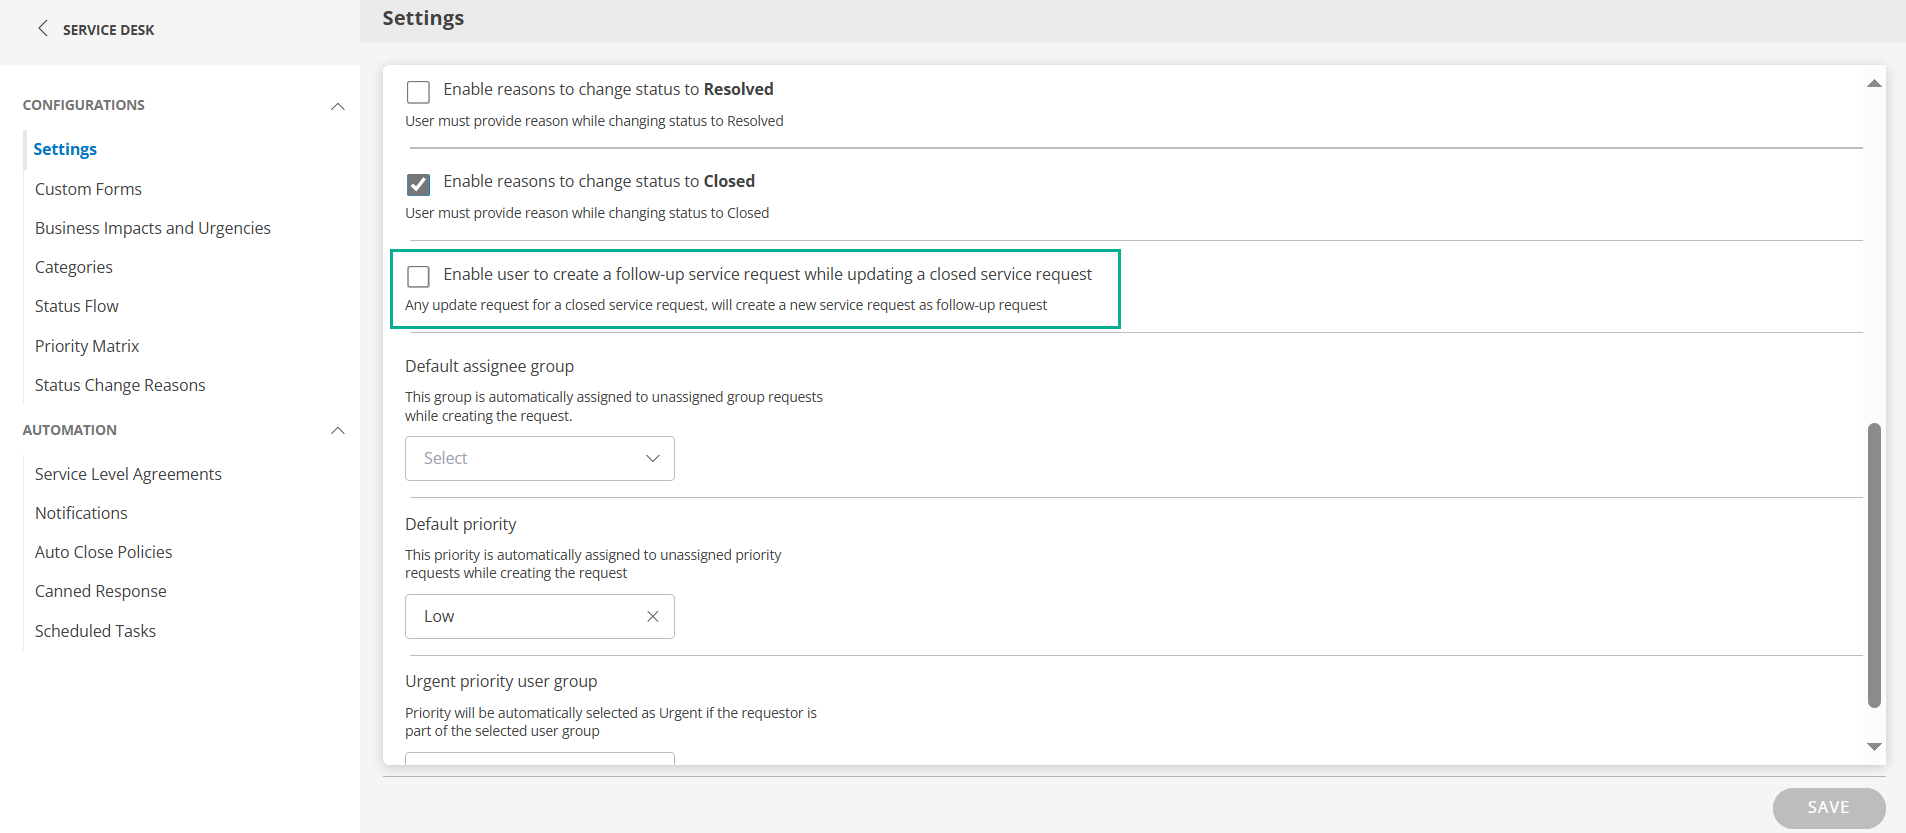
Create Follow-up in Tickets
- Navigate to Command Center > Tickets and select a closed service request.
- Click ADD FOLLOW UP.The follow-up service request is created successfully.
Associate Changes with Other Entities
Attach a single or multiple incidents or task requests to an existing Service Request. As service requests are closed, the incidents and task requests are automatically resolved and closed.
Attach an existing incident or task request
Navigate to Command Center > Tickets.
Click Service Request ID.
On the service request details page, select the ATTACHED REQUESTS tab.

Click + ADD to add a new incident or task.The Attached Requests page is displayed.

Select the request ID you want to add and click SAVE.
Note
- To attach an incident, the user must have the Manage Incident permission. Otherwise, the incidents do not appear on the Incidents/Tasks page.
- To attach a task request, the user must have the Manage Task Request permission. Otherwise, the task requests do not appear in the Incidents/Tasks page.
- If the user has the Manage Service Desk permissions, the incidents and task requests can still be attached to the service request though the user has only View Incident and View Task Request permissions.
- To know about the available permissions for a user, go to Setup > Accounts > Users, select a user, and click View under User Roles.
Close a service request
Configure Auto-Close Policies to close service requests that are resolved and that have been in the inactive state for a certain elapsed time.
Navigate to Setup > Account > Service Desk.
In the left navigation pane, navigate to the Automation section and select Auto Close Policies.The Auto Close Policies page is displayed.

From Auto Close Policies, select Auto Close Service Requests.The POLICY - AUTO CLOSE SERVICE REQUESTS screen is displayed.

Enter the following information:
| Field | Description |
|---|---|
| Request Type | Type of the request. |
| Name | Auto-close policy name. |
| Reason | Reason for auto-close. |
| Tickets Resolved Exceeding | Inactive interval of a resolved service request beyond which the service request needs to be closed. |
- Click SAVE to activate auto close.